There's a familiar arc in every family home. The basement starts life as a bright, padded play zone — foam mats, a toy kitchen, a basket overflowing with stuffed animals. Five years pass. The kids grow up. The space doesn't.
Suddenly, that cheerful playroom becomes a sad little storage locker stacked with dusty bins, a broken air hockey table, and the unmistakable smell of a craft project that didn't dry properly in 2019.
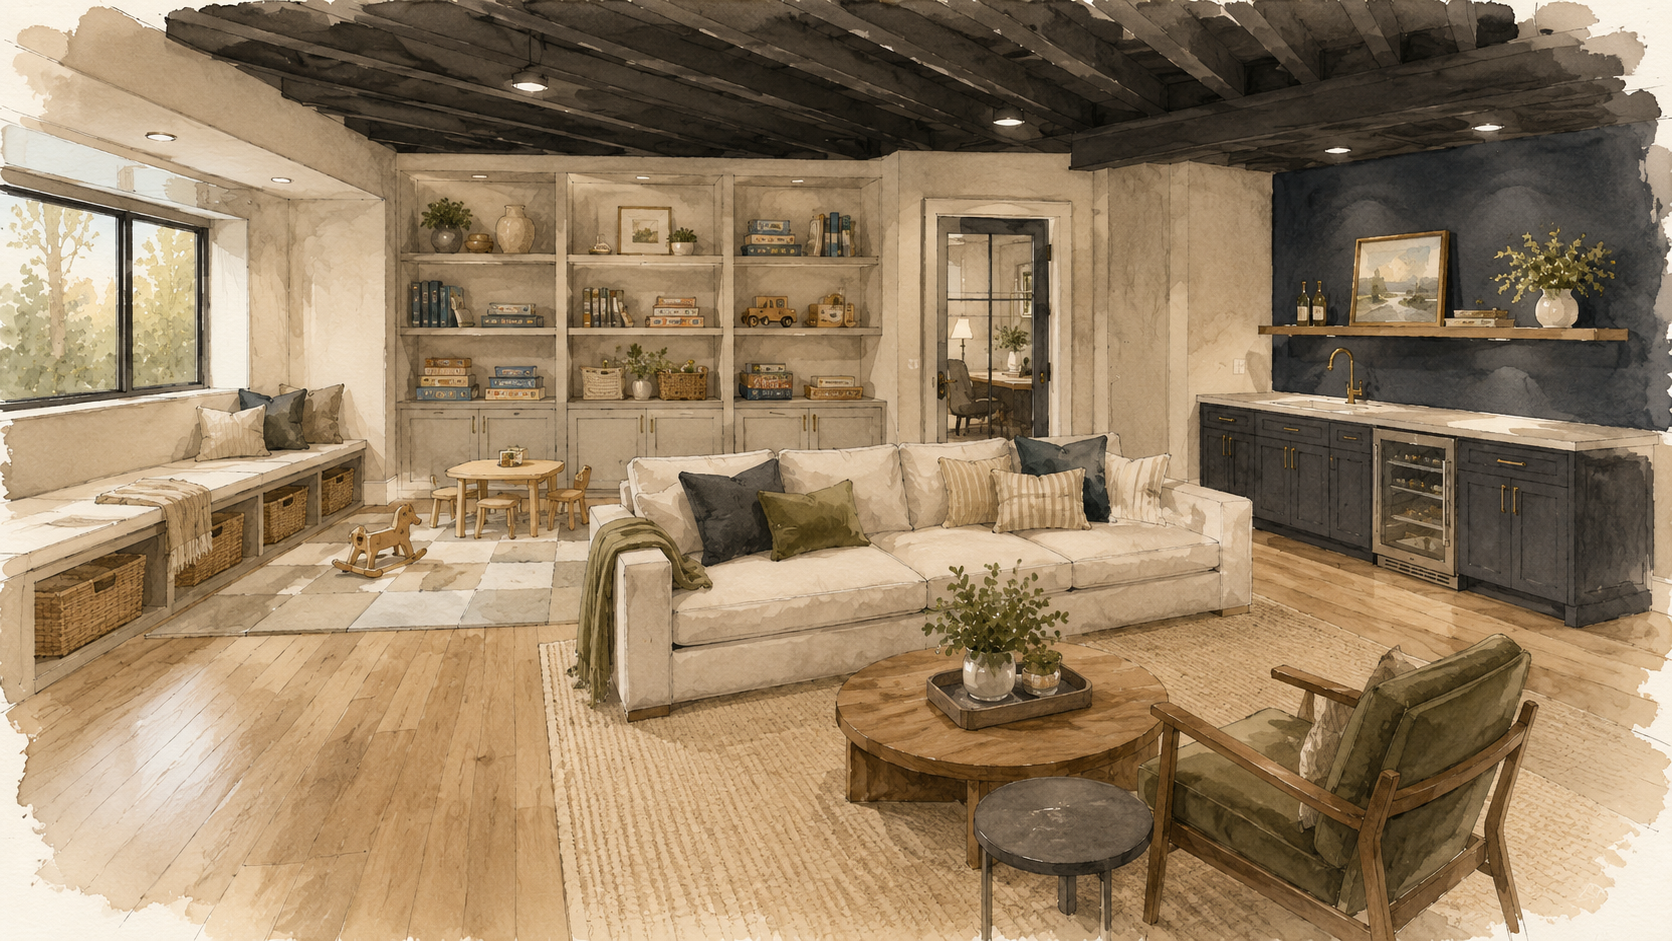
It doesn't have to go that way. A well-designed half-finished basement can serve your family at every stage — a play zone at age five, a homework hub at twelve, a teen hangout at sixteen, and a home gym, media lounge, or guest suite once the nest empties. The trick is designing for adaptability from day one.
In Twin Cities homes — where basements are common and long winters make every square foot count — a smart half-finished basement is one of the highest-value investments you can make. Here's how to do it right.
Phase 1: Designing the Active Kid Zone
Think of Phase 1 as the first ten to twelve years of your basement's life. The priorities are simple: durability, visibility, and storage that disappears.
Design priorities for the kid years
- Durability over delicacy — finishes need to survive juice spills, scooter wheels, and Nerf battles.
- Open sightlines — parents should be able to supervise multiple zones from one spot.
- Hidden storage — toys multiply. Storage should put them away in seconds.
Key finishes and features
- Luxury vinyl plank (LVP) flooring — waterproof, scratch-resistant, and soft enough underfoot with a quality pad. See our ultimate guide to basement flooring materials for a deeper comparison.
- Modular carpet tiles in a defined play zone — replaceable square by square if stained or torn.
- Washable, satin-finish paint in warm neutrals. Skip the bright primary mural — it dates fast and signals "kid zone" forever.
- Built-in benches with removable bins instead of permanent toy structures or playhouse nooks.
- Half walls or open shelving instead of full partition walls — preserves long-term flexibility.
- One small enclosed room for quiet play, naps, or a future home office or guest bedroom.
For more on family-friendly design that doesn't sacrifice long-term style, see our post on designing child-friendly spaces without sacrificing style.
Cost range and timeline
- Cost to finish a basement (Phase 1): $25,000 – $55,000 for a typical 600–900 sq. ft. layout
- Timeline: 4 – 8 weeks
- Future flexibility score: 9/10 if designed with Phase 2 in mind
These numbers track with Remodeling Magazine's 2024 Cost vs. Value Report, which lists midrange basement remodels among the most consistently valuable interior projects. For more on stretching that budget, browse our list of basement finishing ideas to maximize your ROI.
Phase 2: Transitioning to an Empty Nest Sanctuary
Phase 2 covers years 12 through 25 and beyond. The kids leave. Needs shift toward adult lifestyle, hobbies, hosting, and work-from-home. The same square footage now has to grow up.
Common Phase 2 conversions
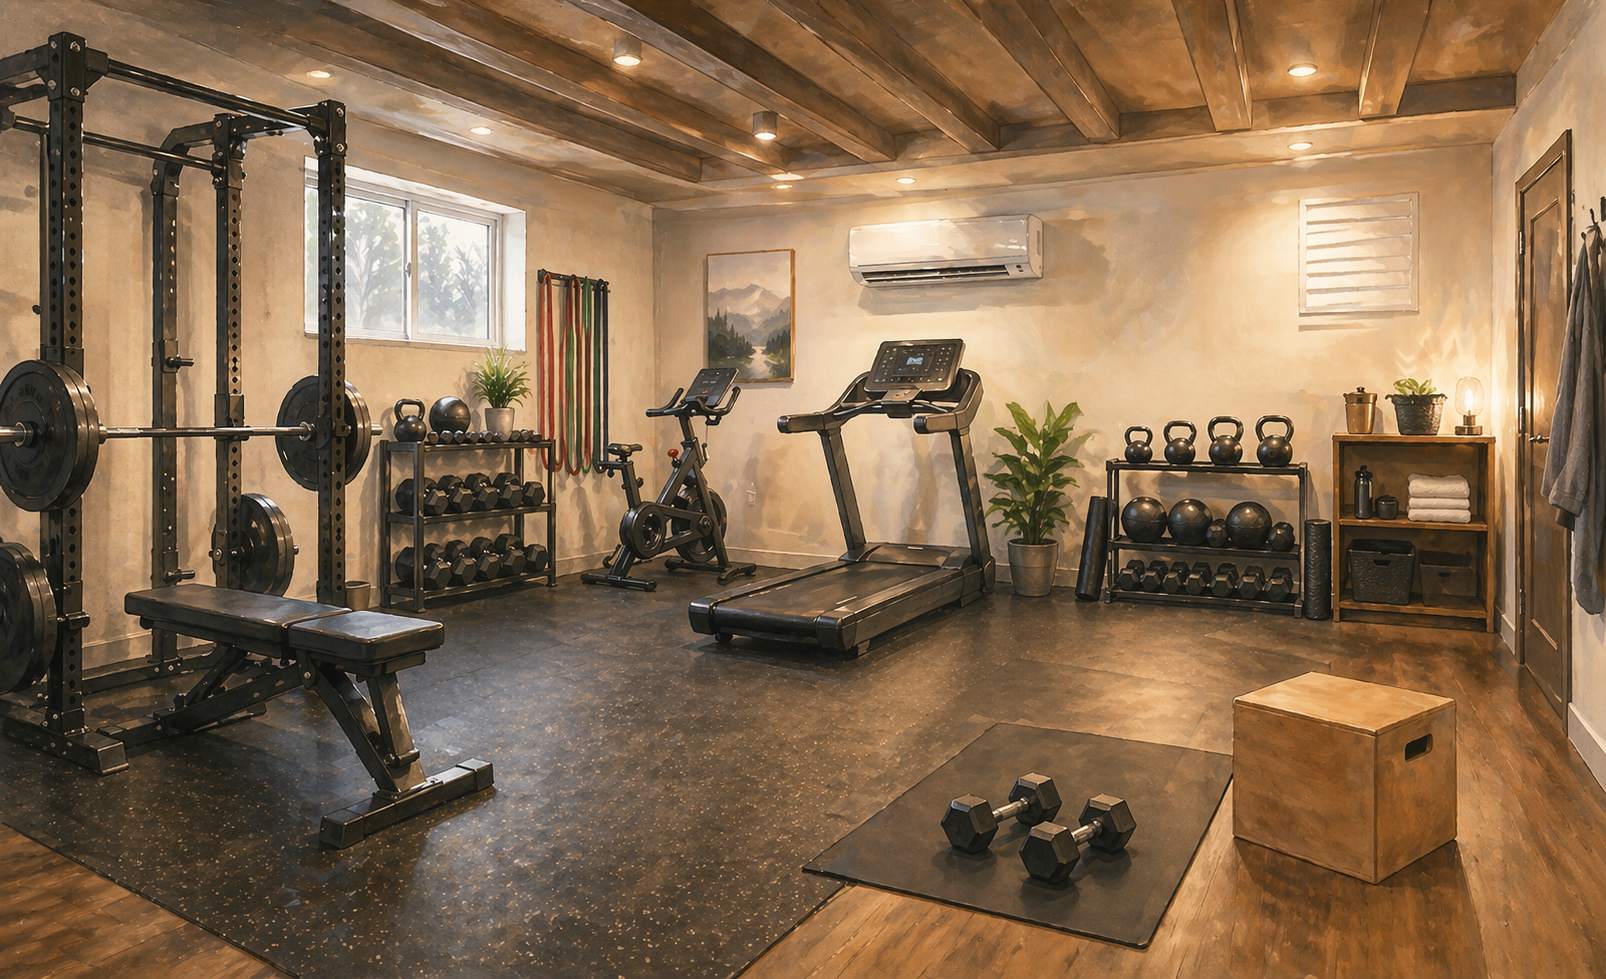
- Home gym — swap the play zone for rubber tile mats (or keep your LVP), add wall mirrors and a TV. Cost: $3,000 – $8,000. For ventilation and flooring tips, see our home gym flooring and ventilation guide.
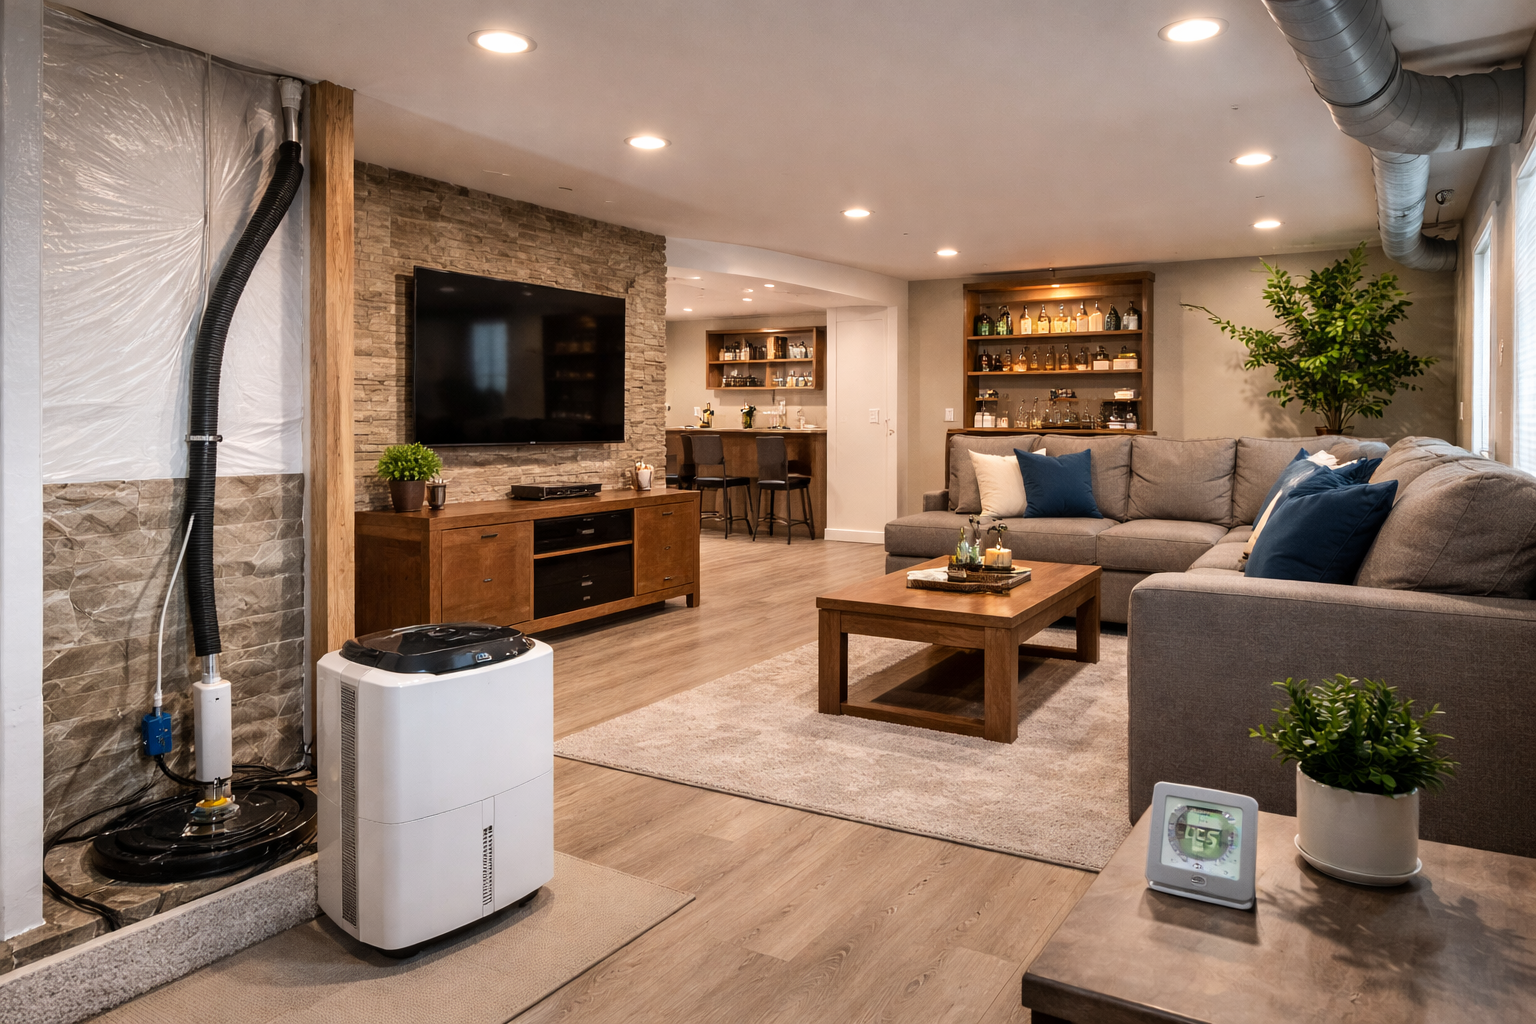
- Media lounge — convert the open play area into a sectional-and-screen setup. Cost: $5,000 – $15,000 depending on AV.
- Guest suite or in-law space — the small enclosed quiet room becomes a bedroom, and that bathroom rough-in finally pays off. Cost: $10,000 – $25,000 to finish. Be sure your design meets Minnesota's legal basement bedroom requirements.
- Hobby or craft studio — modular shelving and good lighting transform storage walls into a creative workspace.
- Home office or studio — the original homework nook grows up gracefully. See the benefits of creating a home office in your finished basement.
Cost range and timeline
- Cost to convert: $3,000 – $25,000 depending on scope
- Timeline: 1 – 4 weeks
- Flexibility score: entirely dependent on Phase 1 decisions
The bathroom rough-in tip
Always rough in plumbing during Phase 1 — even if you don't finish the bathroom yet. Adding plumbing to a finished basement later can cost three to five times more than including it in the original build. For layout ideas, see our guide to basement bathroom ideas.
Smart Adaptable Finishes That Grow With You
The finishes you choose in Phase 1 decide how painful (or painless) Phase 2 will be.
Finishes that age gracefully
- Painted exposed ceilings in matte black or warm white. Trendy now, but also cheaper than drop ceilings and easier on future access to mechanicals. See basement ceiling ideas for inspiration.
- Modular carpet tiles — swappable color palettes, replaceable squares, and removable if you ever want to switch to LVP.
- Neutral wall colors with one easily repaintable accent wall.
- LED recessed lighting on dimmers — flexible for playtime, movie night, or a 6 a.m. workout.
- Hidden built-in storage — banquettes, under-stair drawers, and bench seating that serve toys today and wine, gear, or linens tomorrow. Our basement storage solutions guide has more ideas.
- Universal-height countertops (36") in any wet bar or kitchenette — works for kid snack stations and adult entertaining alike.
- Pre-wired conduits for future TVs, gym equipment, sauna, or sound systems.
Finishes to avoid
- Themed murals and character wallpaper.
- Built-in jungle gyms, train tables, or playhouse nooks.
- Thick padded wall-to-wall carpet that's hard to remove cleanly.
- Permanent kid-sized vanities, countertops, or seating.
Five Mistakes That Turn Your Basement Into a Storage Locker
- Building permanent, age-specific structures. A built-in pirate ship is charming for three years and a remodeling expense forever.
- Skipping the bathroom rough-in. Plumbing added later can triple the cost.
- Over-partitioning the space. Too many small rooms kill flexibility. Open layouts adapt; chopped-up basements don't.
- Cheap flooring on a slab. Save here and you'll replace it within ten years. LVP, polished concrete, or quality engineered flooring pays back.
- No long-term lighting plan. Lighting designed only for play makes adult use feel like working inside a daycare.
For a broader pre-build checklist, our basement remodel planning advice covers the early decisions that prevent costly mid-project pivots.
Your Future-Proof Basement Checklist
Before construction begins, run through this list. Every unchecked box is a future remodel waiting to happen.
- ☐ My floor plan leaves at least one large, open multi-use zone.
- ☐ Plumbing is roughed in for a future bathroom, even if it isn't finished now.
- ☐ Flooring is durable, waterproof, and adult-appropriate (LVP, polished concrete, or modular carpet).
- ☐ Storage is modular and removable, not built around specific toys or ages.
- ☐ Wall colors and finishes are neutral, with any accent areas easy to repaint.
- ☐ Lighting is dimmable and zoned for play, work, and entertaining.
- ☐ I've pre-wired for future tech, gym equipment, or AV.
- ☐ No permanent, age-specific structures are part of the build.
- ☐ An experienced contractor has reviewed the design for long-term flexibility.
Design Once. Adapt Lightly. Enjoy for Decades.
The best half-finished basements are designed for the family you have today and the family you'll be in fifteen years. A basement designed once and adapted lightly is far cheaper — and far more enjoyable — than a basement remodeled twice.
It's also one of the most reliable ways to increase the value of your home over the long run.
At Honey-Doers Remodeling, we specialize in adaptable basement designs that serve every stage of family life. Our in-house design team helps Twin Cities homeowners zone their basements thoughtfully, choose finishes that age gracefully, and pre-plan the rough-ins that make future transitions simple. Whether you're starting with a play zone or already eyeing a home gym, we'll help you build a basement that grows with you.
If you're ready to plan a basement that works today and decades from now, contact Honey-Doers to schedule a consultation.