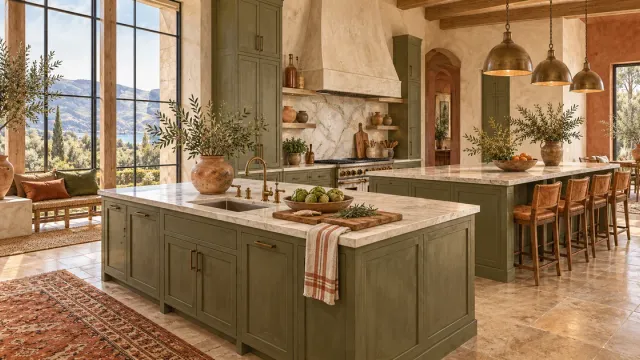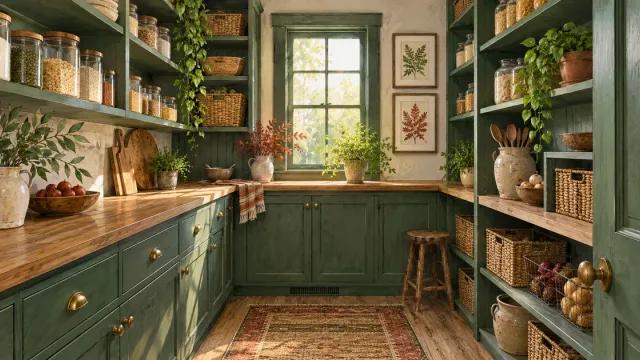
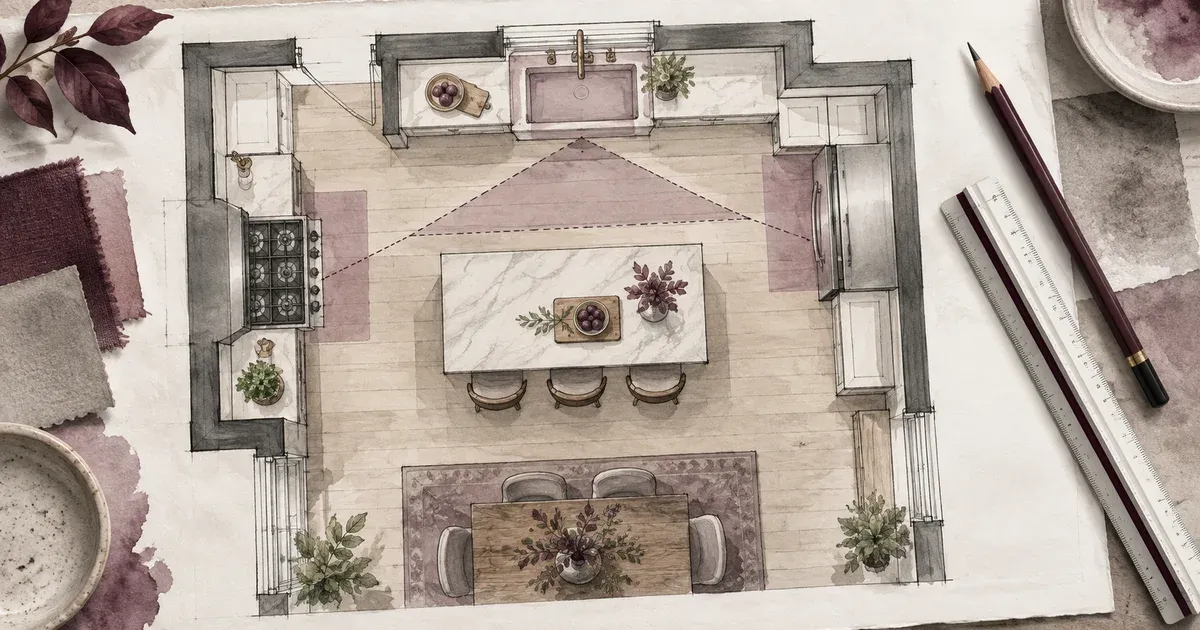
A kitchen can have beautiful cabinets, durable countertops, and new appliances yet still feel frustrating if the layout does not match how your household lives. Knowing how to plan a kitchen layout remodel starts with the practical moments: where groceries land, how two people pass each other at dinner, where the coffee maker belongs, and whether there is a clear path through the room when guests arrive.
For many Twin Cities homeowners, the issue is not simply that a kitchen looks dated. It is that the room was designed for a different era of family life. A thoughtful layout remodel can make an older home feel more comfortable and capable without adding unnecessary square footage or surprises to the project.
- Start With How Your Kitchen Is Used Now
- Measure the Room and Map the Constraints
- Choose a Layout That Fits the Space
- Plan Work Zones, Not Just the Kitchen Triangle
- Give Traffic Its Own Path
- Make Storage Specific and Accessible
- Give Lighting the Same Planning as Layout
- Set the Budget Before Finalizing the Plan
- Test the Layout Before Construction
Start With How Your Kitchen Is Used Now
Start by observing the kitchen you have for a week before looking at cabinet styles or picking a backsplash. Notice where congestion happens, which cabinets are hard to reach, and what ends up living on the counter because there is no logical storage space. Those small daily frustrations are often the clearest guide to a better plan.
Think about who uses the kitchen and when. A couple who mostly cooks together may need wider work aisles and two prep areas. A busy family may care more about a landing zone for backpacks, a snack drawer, and seating that keeps children nearby without putting them in the cooking path. If you host holidays or neighborhood gatherings, circulation around an island may matter as much as the island itself.
It also helps to separate needs from wishes. More counter space may be a need; a second wall oven may be a wish. Both can be worthwhile, but making that distinction early helps direct the budget toward changes that will improve everyday life.
Measure the Room and Map the Constraints
A layout is only as sound as the measurements behind it. Measure wall lengths, ceiling height, window and door openings, and the location of existing plumbing, electrical panels, heating vents, and structural walls. Include the swing of every door, including doors to a pantry, garage, basement, or nearby laundry room.
Do not assume every wall can move or every appliance can relocate without added cost. Moving a sink, range, or refrigerator can be possible, but it may involve plumbing, gas, electrical work, venting, permits, and changes below or behind the walls. In a split-level, rambler, or older Twin Cities home, the framing and mechanical systems can strongly influence the most sensible plan.
Many South Metro homes built before the 1980s run supply plumbing through a slab or a shallow crawlspace, and Minnesota's frost depth code requires new exterior water lines to sit well below grade. Relocating a sink to an exterior wall can mean trenching below the frost line, not just moving a pipe a few feet — a detail worth pricing before it becomes a change order.
A remodeling professional can verify these details before the design becomes too far along. This is one of the most valuable parts of planning: understanding what is realistic before ordering materials or making decisions based on an inspiration photo.
Choose a Layout That Fits the Space
The best kitchen layout is not the one that is popular online. It is the one that gives your household useful work areas, comfortable traffic flow, and storage where it is needed.
| Layout | Works best for | Watch out for |
|---|---|---|
| One-wall | Condos, small homes, open floor plans | Limited counter space without an island |
| Galley | Serious home cooks who want everything close | Needs enough clearance for two people to pass |
| L-shaped | Open kitchens that need a defined work area | Corner cabinets can become dead storage |
| U-shaped | Households wanting maximum counter space | Can feel enclosed in a narrow room |
| Peninsula | Larger kitchens wanting island-style zones | Still needs a clear route through the room |
A one-wall kitchen can work well in a condo, smaller home, or open floor plan, particularly when paired with an island for prep and seating. A galley kitchen is efficient for serious cooking because everything is close at hand, but it needs adequate clearance so two people can work without blocking each other.
An L-shaped layout often suits open kitchens because it defines the work area while leaving room for a table or island. A U-shaped kitchen provides generous counter space and can create strong work zones, although it may feel enclosed if the room is narrow. For larger spaces, a peninsula can offer many of an island's benefits while preserving a clearer route through the kitchen.
An island deserves careful consideration. It can add storage, seating, and a valuable prep surface, but only if there is enough room around it. A too-large island can turn a comfortable kitchen into an obstacle course. In some homes, a slimmer island, a peninsula, or a well-designed table provides a better result.
Plan Work Zones, Not Just the Kitchen Triangle
The traditional kitchen triangle connects the sink, refrigerator, and range, and it remains a useful starting point. Modern kitchens often work better, though, when planned in zones that put supplies near the task they support, an approach Houzz outlines in its kitchen layout planning guide.
Place everyday dishes and glassware near the dishwasher. Store pots, pans, and cooking utensils close to the range. Keep knives, cutting boards, and mixing bowls near the primary prep counter. A coffee station works best with nearby mugs, beans, water access, and a place to set the machine without crowding the main work area.
The refrigerator needs landing space nearby for groceries and meal prep, and so does the oven and microwave. These are simple details, but they prevent the awkward experience of carrying hot pans across the room or balancing grocery bags on the floor because there is nowhere to set them down. If groceries typically come in through a garage or mudroom door, weigh that route when placing the refrigerator and pantry — a pantry that looks balanced on the floor plan can still add a weekly walk across the kitchen if it sits far from where bags actually land.
When planning zones, protect the main prep area. A useful prep counter is usually located between the sink and range or immediately beside one of them. Avoid making that space the route to the refrigerator, pantry, or patio door whenever possible.
Give Traffic Its Own Path
Traffic flow needs its own plan because many layout problems come from treating the kitchen as a single-purpose room. It is often a hallway to the backyard, garage, dining room, or family room. If people must walk through the cooking area to reach another part of the home, the plan needs to account for that traffic.
A well-designed kitchen gives cooks room to work without forcing family members or guests to squeeze behind them. The NKBA Kitchen Planning Guidelines call for at least 42 inches of clearance in a one-cook kitchen and 48 inches where two people work at once — and more where island seating pulls stools out into the walkway. Seating should be positioned so people can visit without standing in front of the refrigerator or range. If a pet feeding area, desk, or charging station is part of the room, give it a deliberate location rather than fitting it into leftover space.
Clearances matter, but they are not one-size-fits-all. Appliance doors, drawer pulls, island seating, and nearby walkways all need to work together. A professional design review can identify conflicts that are easy to miss on paper, such as a dishwasher blocking the only path to the sink or bar stools preventing a pantry door from opening.
The cleanup zone deserves the same scrutiny. Picture the dishwasher door fully open — it should not become the only obstacle between the sink and the rest of the kitchen, and it should not trap whoever is standing at the sink while it runs. Keeping everyday dishes, glassware, and flatware within a step or two of the dishwasher, rather than across the room, is what actually gets the whole household unloading it instead of leaving it to one person.
Make Storage Specific and Accessible
Storage works best when it is organized by what is easy to see, reach, and return, not simply by how many cabinets the kitchen has. Deep drawers are often more practical than lower cabinets with fixed shelves, especially for cookware and food storage. Pullout shelves can make a narrow pantry more useful, while a tall cabinet may be better reserved for brooms, trays, or small appliances.
Start by inventorying what you own. Count the everyday dishes, serving pieces, cookware, pantry staples, and countertop appliances that need a home. Be honest about items that rarely get used. A remodel is an opportunity to reduce clutter, but the kitchen still needs to accommodate the things that matter to your household.
Think beyond the main cabinets. A dedicated recycling pullout, drawer for lunch supplies, charging drawer, or appliance garage can solve a recurring annoyance. These features should support your routine, not simply add complexity or cost.
A highly specific insert is worth it only when it serves something you do often — a single-purpose organizer can turn into wasted space the moment habits change, so start with flexible drawers and pullouts and add specialty features sparingly.
Give Lighting the Same Planning as Layout
Lighting affects how well a kitchen layout actually functions, not just how it looks. General ceiling light keeps the room bright, but it is task lighting — under-cabinet fixtures over the prep counter and sink, and pendants over an island — that removes the shadows cast by your own body while you work.
Plan the layers together rather than adding fixtures as an afterthought once cabinets are installed. Under-cabinet lighting should follow the counter, not just the cabinet run above it, so there are no dark gaps at the exact spots used for chopping or reading a recipe. Pendants over an island should be sized and hung to define the space without producing glare for anyone seated across from the cook. Dimmers on each layer let the same room shift from focused meal prep to a relaxed evening without adding more fixtures than the space needs.
Set the Budget Before Finalizing the Plan
Setting a realistic investment range before the design is finalized lets you prioritize the decisions that affect function first. A kitchen layout remodel can have a meaningful impact on cost, especially when it involves walls, windows, mechanical systems, or appliance locations.
It is wise to reserve a contingency for conditions discovered after demolition, particularly in older homes. Water damage, outdated wiring, uneven framing, or hidden ductwork can require additional work. Clear conversations about allowances, scope, and change orders help protect your budget and avoid the feeling that decisions are being made under pressure.
Quality craftsmanship is not just about the finished appearance. It is also about careful planning, proper installation, and a process that makes costs and expectations clear before work begins.
Test the Layout Before Construction
Testing the plan on the actual floor, before committing to it, reveals whether the arrangement feels natural. Mark the footprint of an island on the floor with painter's tape. Open imaginary appliance doors. Stand at the sink and picture unloading the dishwasher. Carry a large pot from the range to the sink.
Ask practical questions: Can two people cook at once? Where will groceries go? Is there a place to set a hot baking sheet? Will guests have a route to the patio without crossing the main prep area? Does the layout still work if someone is seated at the island?
A strong remodeling partner will listen carefully, explain the trade-offs, and refine the plan before construction begins. At Honey-Doers, that people-first approach means helping homeowners make decisions with clear expectations and no hidden costs or surprises.
Frequently Asked Questions
How do I know if my kitchen needs a new layout or just new finishes?
If the frustration is mostly about color, material, or age, new finishes may be enough. If it is about congestion, awkward reach, or a workflow that fights how you cook, the layout itself needs to change, not just its surfaces.
Can I move my kitchen sink or range to a different wall?
Often yes, but moving plumbing, gas lines, or venting adds cost and may require permits, especially in older Twin Cities homes where mechanical systems were not designed for relocation. Confirm feasibility with a remodeling professional before finalizing a design around the move.
Is the kitchen work triangle still relevant?
It is still a useful starting point, but most designers now plan in work zones instead, since modern kitchens often include multiple cooks, more appliances, and open sightlines the original triangle concept did not anticipate.
How much clearance do I need around a kitchen island?
Plan for at least 42 inches of walkway on all sides, and 48 inches or more where two people cook at once or where stool seating pulls into the aisle, per NKBA guidelines.
The right kitchen layout should make the room feel calmer on an ordinary Tuesday night, not just impressive when it is newly finished. Plan around the way you actually cook, gather, store, and move through your home, and the investment will continue to serve your family long after the last detail is installed. If you're ready to put a plan on paper, Honey-Doers' kitchen remodeling team can help you turn a week of observation into a floor plan that works.