Roof flashing repair starts with a five-minute check most homeowners never think to do until water is already coming through the ceiling. Flashing is the thin metal that seals every place your roof changes direction or meets something that punches through it — a chimney, a skylight, a wall, a valley where two roof planes meet. When it holds, you never notice it. When it fails, it is usually the actual source of a "roof leak" that looked like a shingle problem.
For Twin Cities homeowners, flashing takes more abuse than it would in a milder climate. Minnesota's freeze-thaw cycles and ice dams work metal seams and sealant joints loose in ways a warmer region's roofs simply do not experience, which means flashing that would last decades elsewhere can fail here in half the time.
- What Roof Flashing Actually Does
- Where Flashing Fails First
- How to Check Your Flashing for Damage
- DIY Fix or Call a Professional
- Why Minnesota Roofs Are Especially Hard on Flashing
- Frequently Asked Questions
What roof flashing actually does
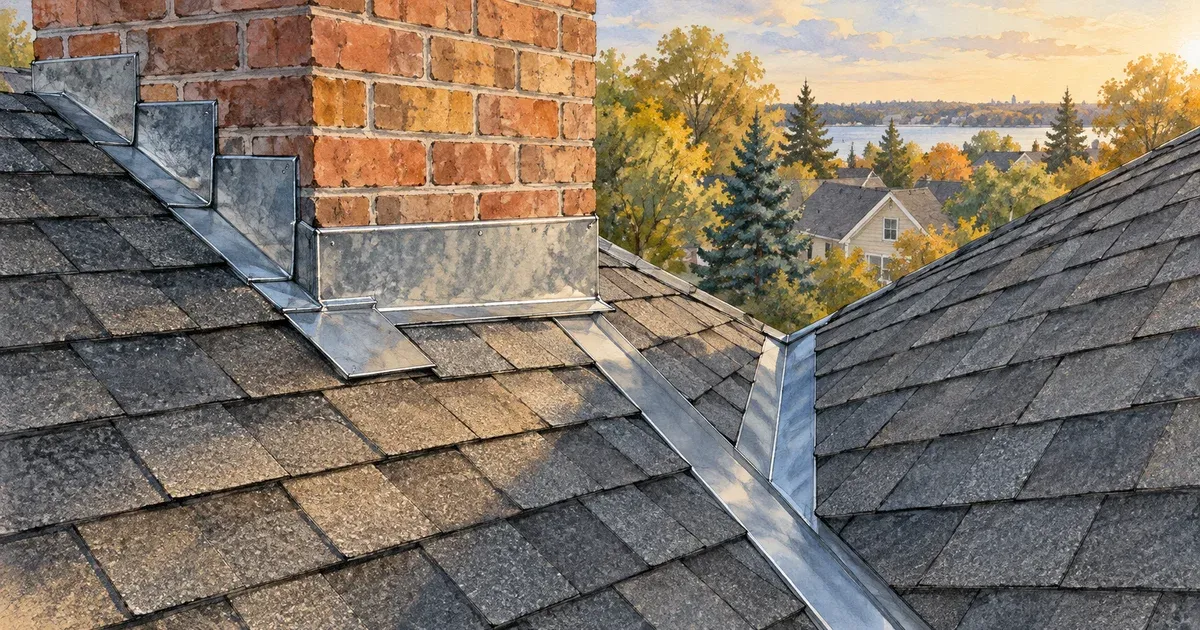
Flashing directs water away from every seam and penetration in your roof instead of letting it pool or seep in. It is typically galvanized steel, aluminum, or copper, installed in layers so that water always runs over the next piece down rather than behind it. Shingles handle open, sloped surfaces well on their own; flashing handles the joints where shingles alone cannot form a seal.
That distinction matters because a homeowner inspecting a roof from the ground often checks shingle condition and stops there. Flashing failure does not always show up as a visible gap. It can show up first as a water stain on an interior ceiling, a damp smell in an attic, or mold near a chimney chase — all signs the leak is coming from a joint, not an open shingle field.
Where flashing fails first
Flashing fails at the same handful of locations on almost every roof, because those are the places metal, sealant, and shingles all have to meet cleanly.
Roof valleys — where two roof slopes meet at an angle — carry more water volume than any other part of the roof, and valley flashing takes the most wear as a result. Chimneys are a close second: the step flashing along the sides and the counter-flashing embedded into the masonry both rely on sealant that dries out and cracks over years of sun and freeze-thaw cycling. Skylights and roof-mounted vents have a similar failure pattern, just on a smaller scale. Where a roof meets a sidewall — a dormer, an addition, a chimney chase — wall flashing (sometimes called step flashing) is especially prone to being installed shallow or getting dislodged by ice buildup, since it is tucked behind siding rather than fully visible.
Knowing which of these applies to your roof narrows an inspection considerably. A ranch with no dormers and no chimney has far fewer flashing joints to check than a home with multiple roof planes, a masonry chimney, and a skylight — the walkout-basement homes common around Eden Prairie, with their added roof-to-wall transitions, tend to have more of these joints than a simple gable roof.
Flashing wear is also one of the clearer signs a roof is nearing the end of its life rather than just needing a spot repair — worth keeping in mind if you are seeing flashing issues alongside granule loss or curling shingles elsewhere on the same roof.
How to check your flashing for damage
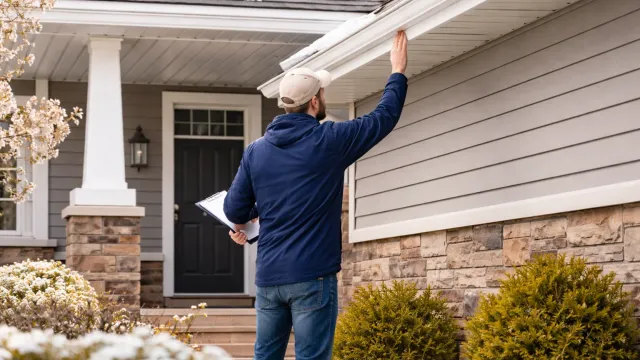
The first useful check is visual, from the ground, with binoculars if you have them. Look for flashing that appears rusted, visibly separated from the roof surface, or missing sealant at a seam — any of these is a sign flashing has already started to fail, not just aged cosmetically.
A closer inspection from a ladder (or hired out if your roof pitch or height makes that unsafe) can confirm what the ground check suggested. Look for gaps between the flashing and the roofing material, cracked or missing sealant, and any rust that has progressed past surface discoloration into actual pitting or thinning of the metal.
Don't walk a roof to inspect flashing yourself, especially with any ice, moss, or steep pitch involved. A pair of binoculars from the ground and a look from a stable ladder covers most of what you need to know before deciding whether a professional inspection is worth scheduling.
The most reliable confirmation, though, comes from inside the house. Water stains on a ceiling below a chimney or valley, a musty smell in the attic near a roof penetration, or visible mold on framing near a chimney chase all point to flashing that has already let water in, even if the exterior damage is not obvious yet. Catching it at this stage is still much less costly than catching it after a ceiling has sagged or insulation has been saturated.
DIY fix or call a professional
A small, well-defined flashing problem is a reasonable DIY job. Re-sealing a small gap with roofing sealant, or replacing a short section of flashing that has separated but is otherwise intact, is within reach for a homeowner comfortable on a ladder and working with basic roofing tools and materials.
Extensive damage changes that calculus. If flashing has rusted through, if a large section has come loose, or if water has clearly gotten past the flashing and into the structure, the repair now involves diagnosing how far the water traveled — not just resealing a seam. Chimney flashing in particular is a common place where a DIY fix looks complete from the outside but leaves the counter-flashing/masonry interface unsealed, which lets the same leak recur within a season or two.
If you are already seeing interior water stains, active mold, or you are not confident distinguishing a cosmetic issue from a structural one, that is the point to call a professional rather than attempt a repair. A roofing inspection can confirm whether the fix is a flashing repair, a broader roof-deck issue, or both — a distinction that is hard to make accurately without getting eyes directly on the problem area.
Why Minnesota roofs are especially hard on flashing
Minnesota's winters put flashing through a stress cycle that milder climates do not create. Snow melts from roof heat loss, refreezes at the eave, and forms ice dams that back water up under shingles and against flashing seams that were never designed to hold standing water. According to University of Minnesota Extension, ice dams can begin forming with as little as two inches of accumulated snow on a poorly insulated or ventilated roof, and the resulting water intrusion is one of the most common causes of interior roof leaks in the state.
Freeze-thaw cycling compounds the problem even without a full ice dam. Metal flashing and the sealants around it expand and contract with every freeze and thaw, and Minnesota can run through dozens of these cycles in a single winter. Over years, that repeated movement is what causes sealant to crack and fasteners to work loose well before the flashing itself would otherwise be due for replacement.
This is also why flashing repair is worth budgeting for proactively rather than only after a leak appears. The JLC Cost vs. Value report consistently shows that maintenance-driven repairs recoup their cost by preventing much larger damage down the line — a pattern that holds especially well for something as inexpensive to fix early and expensive to ignore as flashing.
Frequently asked questions
How do I know if my roof leak is a flashing problem and not a shingle problem?
Flashing problems typically show up as water stains concentrated near a chimney, skylight, roof valley, or the edge where a roof meets a wall — not spread evenly across a ceiling. If shingles in the open field look intact but you have a leak near one of those transition points, flashing is the more likely cause.
How much does roof flashing repair typically cost?
A small, localized flashing repair is usually one of the least expensive roofing fixes available, often addressed during a routine roof inspection. Cost rises quickly if water has already reached the roof deck or interior framing, since that adds structural repair on top of the flashing work itself.
Can I repair roof flashing myself?
A minor issue, like resealing a small gap or replacing a short section of intact flashing, is a reasonable DIY project for someone comfortable on a ladder. Rusted-through flashing, large sections that have come loose, or any sign that water has already entered the home are better left to a professional.
How often should roof flashing be inspected in Minnesota?
An annual check, ideally in fall before the first hard freeze, catches most developing issues before winter's freeze-thaw cycles and ice dam risk make them worse. A check after any major storm is also worth doing, since wind and hail can dislodge or dent flashing that was otherwise sound.
Flashing is one of the least visible parts of a roof and one of the most consequential when it fails. Catching a small gap or a cracked sealant joint early is a minor fix; catching the same problem after a winter of ice dams and freeze-thaw cycling usually is not. If you are not confident distinguishing a cosmetic issue from an active leak, contact us to schedule an inspection before a small flashing problem becomes a much larger repair.