Introduction: The Role of Paint Finish in Home Design
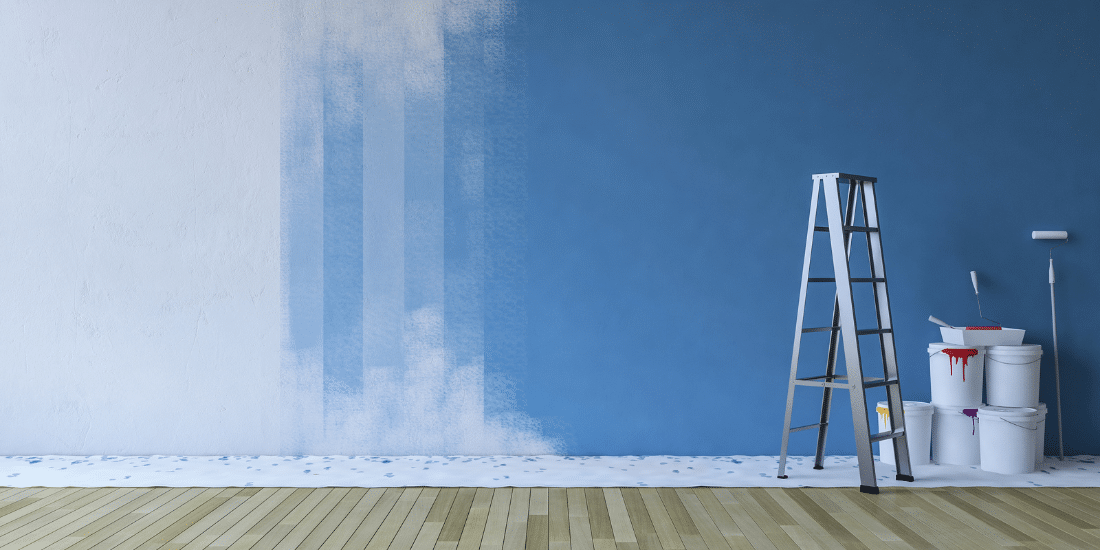
Choosing the perfect paint color gets a lot of attention—but just as important is selecting the right paint finish. The finish of your interior paint doesn’t just affect how your walls look. It also plays a major role in how the space feels, how well the walls hold up to wear and tear, and how easy they are to clean. From matte vs glossy paint decisions to subtle shifts between satin vs matte paint finishes, the right choice can elevate your space and extend the life of your interior surfaces.
Different finishes reflect light in different ways, impact how colors appear in the room, and change the tactile experience of a space. Glossy surfaces can make a room feel brighter and more dynamic, while matte walls create a cozy, elegant backdrop. Some finishes are ideal for high-traffic zones and moisture-prone areas, while others are better suited for bedrooms or ceilings.
In this guide, we’ll explore the most common interior paint finishes, explain where they work best, and help you decide how to choose the right paint finish for every part of your home.
Understanding the Five Common Interior Paint Finishes
There are five primary types of interior paint finishes: matte (or flat), eggshell, satin, semi-gloss, and high-gloss. Each one offers different benefits in terms of durability, appearance, and maintenance.
1. Matte / Flat Finish
Matte paint offers a smooth, non-reflective finish that gives walls a soft, rich look. It’s excellent for hiding imperfections and creating a calming feel in bedrooms, home offices, or living rooms. However, matte paint is the least durable of the bunch and can be difficult to clean without damaging the surface. It’s best used in low-traffic areas.
2. Eggshell Finish
Eggshell offers a very subtle sheen—just enough to catch a bit of light without being shiny. It’s more durable than matte and easier to clean, making it a popular choice for hallways and family rooms. Eggshell provides a balance between aesthetic softness and functional resilience.
3. Satin Finish
Satin has a soft, velvety sheen and is considered one of the most versatile finishes. It’s more washable than eggshell and performs well in moderate to high-traffic areas like kitchens, bathrooms, and children’s rooms. Satin paints work well on trim and cabinetry when a slightly understated shine is desired.
4. Semi-Gloss Finish
Semi-gloss is highly reflective and extremely durable. It’s ideal for moisture-prone areas and surfaces that require frequent cleaning, such as bathroom walls, kitchen backsplashes, trim, doors, and baseboards. However, it tends to show surface flaws more easily, so prep work is essential.
5. High-Gloss Finish
High-gloss is the shiniest and most durable of all finishes. It gives surfaces a glass-like appearance and is commonly used for accent pieces, cabinetry, furniture, and doors. It’s also the easiest to clean—but the most revealing of imperfections.
Understanding these basic finishes will help you make informed choices depending on how each room functions and what kind of aesthetic you’re going for.
Finish by Function: Matching Paint Sheen to Room Use
When deciding between matte vs glossy wall paint or choosing satin vs matte paint finishes, the most important consideration is how the space will be used.
- Bedrooms and Living Rooms:
These lower-traffic areas are perfect for matte or eggshell finishes. If you want a calm, inviting vibe and don’t expect much wall contact, matte creates an elegant look. Eggshell is a good alternative if you want slightly more durability with a similar visual softness. - Hallways and Stairwells:
These areas get touched and bumped frequently, making satin a top choice. Its washability and light-reflective quality keep the space looking fresh while being easy to maintain. - Kitchens and Bathrooms:
Spaces that deal with heat, moisture, and messes need finishes that are durable and washable. Semi-gloss or satin finishes work best here. They’re resistant to mildew and can be wiped clean without leaving marks. - Trim, Doors, and Built-ins:
These architectural details often benefit from a semi-gloss or high-gloss finish. The added shine gives them visual separation from the walls and helps them stand up to constant wear. - Ceilings:
For ceilings, most homeowners choose matte or flat paint to reduce glare from overhead lights and create a clean, receding surface. However, in bathrooms or kitchens where moisture collects, a satin or semi-gloss ceiling finish might be more appropriate.
How Light, Texture, and Finish Work Together
The way a finish reflects light dramatically affects the perception of space. In smaller rooms or those with limited natural light, glossier finishes can help bounce light around the room and make it feel brighter. That said, they can also emphasize surface flaws and create unwanted glare.
Conversely, matte or eggshell finishes soften light, which can be ideal for larger rooms, textured walls, or areas meant for relaxation. These finishes absorb light rather than reflect it, giving rooms a grounded and cohesive feel.
Textured walls benefit from lower-sheen finishes, which can help hide inconsistencies. If you’re working with plaster, shiplap, or exposed brick, a low-luster paint can help highlight the material’s beauty without overwhelming it.
Pros and Cons of Matte vs Glossy Paint Finishes
Here’s a closer look at the trade-offs between matte vs glossy paint:
| Feature | Matte / Flat | Gloss / High-Gloss |
| Durability | Low | Very High |
| Washability | Low to moderate | Excellent |
| Hides Imperfections | Excellent | Poor (highlights flaws) |
| Appearance | Soft, elegant, subtle | Bold, reflective, dramatic |
| Ideal For | Bedrooms, ceilings, low-touch walls | Trim, cabinets, doors, furniture |
Choosing between these finishes depends on your priorities. If you value ease of cleaning and a striking visual, go glossier. If you’re more concerned with subtlety and texture coverage, matte is your friend.
Design Trends and Finish Combinations for a Modern Look
Current interior design trends favor mixing finishes to create layers and contrast. For instance, a popular look in modern homes is using matte walls paired with semi-gloss trim and cabinetry. This combination allows architectural details to pop while maintaining a soft overall aesthetic.
Another trend gaining traction is high-gloss accent walls or ceilings, especially in dining rooms or powder rooms where a bit of drama is welcome. Glossy finishes can make deep colors like navy or emerald green truly shine—both literally and figuratively.
For a cozy, minimalist vibe, many homeowners are using satin finishes in muted colors. The subtle sheen adds sophistication without overpowering the space. Meanwhile, matte black doors or trim have become a design-forward choice in contemporary homes.
Ultimately, interior paint finishes offer a powerful tool for shaping how a space feels—and working with a design-minded contractor can help you leverage this tool effectively.
Let Honey-Doers Help You Pick the Perfect Paint Finish
Choosing the right interior paint finish is about more than just sheen—it’s about how you want each room to function, feel, and age over time. Whether you’re unsure about matte vs glossy ceiling paint, need guidance on satin vs matte paint finishes, or want to modernize your home with finish contrasts, the Honey-Doers team is here to help.
With years of experience in interior remodels and painting, we help homeowners pick the perfect finish for every room—from soft matte retreats to gleaming high-gloss kitchens. If you’re ready to refresh your home with thoughtful, long-lasting paint choices, reach out to Honey-Doers Remodeling today. We’ll bring your vision—and walls—to life.
Image: bathroom-remodel-planning.png
Topic: 8 Steps to Prepare for Bathroom Remodeling
Description: The objective of this blog is to provide homeowners with a clear, step-by-step guide to planning a successful bathroom remodel whether it’s a full redesign or a more affordable modest upgrade to fixtures. To plan for a bathroom remodel consider these steps and how they impact your design, affordability, workflow, and access to the space:
Assess your needs and goals, Set a realistic budget with a buffer, Decide what to keep vs. replace, Choose a design direction, Select materials and order everything in advance, Hire the right contractor or line up DIY help, Create a detailed work plan and timeline, Plan for daily life during the remodel
Conclude by emphasizing how properly planning for a redesign can help make the actual work of the project feel like a breeze if its DIY, or gets your contractor in and out on budget and on time. End by pitching Compass as a great partner in helping to plan and execute bathroom remodels of all kinds.
Keywords: steps to remodel a bathroom, bathroom redesign, how to plan a bathroom remodel, affordable bathroom remodel
8 Steps to Prepare for Bathroom Remodeling
Why Planning Is the Secret to a Successful Bathroom Remodel
Whether you’re aiming for a full bathroom redesign or a more affordable bathroom remodel, the real work starts long before any tile gets pulled up. Bathroom renovations can be among the most rewarding—and disruptive—projects you take on in your home. Without a plan, it’s easy to go over budget, miss deadlines, or end up with results that fall short of expectations.
Thankfully, a clear roadmap can change everything. Knowing the steps to remodel a bathroom helps you prioritize smartly, stay on budget, and keep your home life running smoothly during the project. From picking your layout to ordering fixtures to deciding whether to DIY or call in the pros, here are eight essential steps for planning a bathroom remodel the right way.
Step 1: Assess Your Needs and Set Clear Goals
Before you start sourcing tile or picking paint colors, take a step back and assess why you’re remodeling in the first place. Do you need more storage? Better lighting? Improved layout for aging in place? Or are you simply ready for a visual refresh?
Consider who uses the bathroom and how often. A primary suite might call for spa-like comfort, while a guest or kids’ bath may benefit more from durable finishes and clever storage.
Write down your goals and divide them into must-haves and nice-to-haves. This clarity helps with decision-making later—especially if you need to adjust plans to stay within budget. Defining your goals early also helps guide conversations with your contractor or designer and ensures you’re working toward a clear vision.
Step 2: Set a Realistic Budget—with a Built-In Buffer
One of the most important parts of how to plan a bathroom remodel is setting a budget that reflects both your ambitions and your financial limits. Bathroom remodels can range from $5,000 for a modest upgrade to $30,000+ for a full custom build.
Include allowances for:
- Labor and trades (plumbing, electrical, tiling)
- Fixtures and finishes (toilets, vanities, faucets, tile, lighting)
- Permits (if required in your area)
- Unexpected costs (dry rot, plumbing reroutes, code compliance)
We recommend setting aside 10–20% of your total budget as a buffer for surprises. Hidden water damage behind a shower wall or outdated wiring can quickly throw your budget off track without that cushion in place.
Step 3: Decide What to Keep vs. What to Replace
Not every bathroom renovation needs to start from scratch. Deciding early on what stays and what goes helps you focus both time and money where they matter most. For example:
- Keeping your existing layout can significantly reduce plumbing costs.
- Retaining a quality bathtub or vanity might free up budget for better tile or lighting.
- Swapping outdated fixtures and repainting walls can still deliver big visual impact.
This step is especially helpful if you’re aiming for an affordable bathroom remodel. Strategic reuse or refinishing—like reglazing a tub or painting cabinets—can stretch your dollar without compromising style.
Step 4: Choose a Cohesive Design Direction
A bathroom remodel is a great chance to rethink the look and feel of your space—but that doesn’t mean you need to follow fleeting trends. Pick a design direction that complements your home’s overall style and fits your personality.
Some design considerations include:
- Color palette: Cool tones like soft blues and greys for a spa feel, or bold contrasts like black and white for drama.
- Tile choices: Subway tile, patterned cement tile, marble-look porcelain—each offers different vibes and care requirements.
- Fixture finishes: Brushed nickel for a timeless look, matte black for modern appeal, or brass for warmth.
Having a cohesive vision helps you stay focused when making decisions, and it ensures everything from the faucet to the grout color works together in harmony.
Step 5: Select Materials Early and Order in Advance
With supply chains still catching up in many sectors, it’s critical to order your materials well before the demo begins. Waiting to pick your tile, vanity, or light fixtures until after demolition starts can lead to costly delays.
Common bathroom materials with lead times:
- Custom vanities and cabinetry
- Countertops (especially stone or quartz)
- Tile, especially specialty or imported styles
- Lighting and plumbing fixtures
If you’re working with a contractor, they can often help you source and schedule material deliveries. Having everything on-site—or scheduled to arrive on time—keeps your project moving forward and minimizes stress.
Step 6: Hire the Right Contractor—or Line Up Help
If you’re going DIY, now’s the time to figure out who’s helping with what. But for most homeowners, hiring a licensed contractor is the best way to ensure a safe, code-compliant remodel that finishes on time and within budget.
When evaluating contractors:
- Check licenses, insurance, and local reviews
- Ask for a portfolio of recent bathroom remodels
- Request a written estimate with scope and timeline
- Ask about their subcontractors (plumbers, electricians, tile setters)
If you’re doing part of the work yourself—like demolition or painting—make sure roles are clear and no steps fall through the cracks. An experienced contractor can even work with you in a hybrid DIY/contractor setup if you’re trying to control costs.
Step 7: Create a Detailed Work Plan and Timeline
Once you’ve lined up your contractor and finalized your material selections, it’s time to build a step-by-step work plan. This should outline:
- When demolition starts
- Key installation phases (plumbing, electrical, tile, fixtures)
- Expected inspection dates
- Target project completion
For a standard bathroom redesign, the full project might take 2–4 weeks depending on scope. Larger or more custom builds can take longer.
Having a realistic timeline helps you plan your life around the remodel. It also makes it easier to identify red flags or bottlenecks early.
Step 8: Plan for Daily Life During the Remodel
If the bathroom being remodeled is your only full bath, you’ll need to plan around temporary inconveniences. That might mean:
- Coordinating shower time with a neighbor or family member
- Renting a portable bathroom unit
- Setting up a small “getting ready” station elsewhere in the home
If you have multiple bathrooms, designate which one will handle traffic during the remodel. Also consider climate and seasonal needs—winter remodels might require extra weatherproofing for open walls or windows.
Making a plan for daily life ensures you stay comfortable while your bathroom is out of commission—and helps minimize stress for your household.
Plan Well, Remodel Smoothly—with Honey-Doers by Your Side
Remodeling your bathroom doesn’t have to be overwhelming. With the right plan in place—clear goals, a smart budget, early material selection, and reliable help—you can transform your space with minimal surprises.
At Honey-Doers Remodeling, we help homeowners navigate every phase of their bathroom redesign, whether you’re planning a modest upgrade or a complete overhaul. From layout planning and fixture selection to managing trades and timelines, we’re your partner in getting it done right.
If you’re ready to make your bathroom work harder, look better, and last longer—reach out to Honey-Doers today. Let’s take the stress out of remodeling and bring your dream bathroom to life.